
Another way that I could use to create the effect of the bumps on the skin was to select 'Cellular' in the Bump map box. Here there was lots more parameters to play around with.
 I found that the Cellular had a very grainy finish. It didn't matter how much I played with the different parameters it stayed quite grainy and the blacks showed up a lot. So I decided to make my own bump map using the flattened face image in Photoshop.
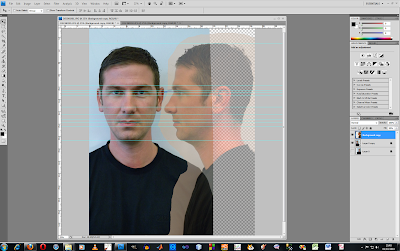
 I started by adding a mid tone grey colour to a layer and then using the 'fill' to add it to the foreground. I then used the 'desaturat' in the 'Image' drop down. Then I adjusted the 'Levels' so that I got a nice representation of the colour values. Next I went into 'Filter','Other' and 'High Pass'. I then needed to next get rid of the embossing effect around the ears and chin with the 'Clone' tool.
 Once this was done I went back into Max and in the bump section I selected 'Mix' which will allow me to have two maps for the bump. The first was the map I have just made and the second was the noise map I liked from before. Here I used the 'mix amount' button to blend the two maps together.
These maps compliment each other quite well they were nice and subtle from a distance but it looked quite realistic when looked at closely. This would be my finished face texture.

 Once I was happy with the the texture I imported it into Max to see what it would look like on my model. It didn't look to bad but it needed a fine bumpy texture for the skin cells.


 I then
  Next I needed to weld all the
  Finally I saved the image as a


 The center of the ear had to be sunken down to make the 'Ear hole' this was done by using the bevel tool and moving the polygons towards the head.
 The last thing part of the ear stage was to
  The
The 


 The head was made from a sphere shape that I matched up with the side
  I then used the editable poly
  Next I needed to simplify the
  This became quite tricky to use the geometry leading into the lips and not create any triangles. After a few attempts on the top lip I started on the bottom. Here I needed to add a couple of extra lines going down the chin so I had more geometry to work with.
 I also had to make the bottom lip have three sections, this was necessary to make the lip fatter. Once the bottom lip was done I realised that it wasn't essential to have the geometry exactly matching up for both lips as the lips would be folded into the mouth and it wouldn't cause any pinching or problems.


 There was also problems with the flow of the lines because they didn't compliment the structure a nose I was finding it very hard to make the model flow without having lots of triangular shapes in it.

 Here I had to use my judgment to place all the


 Once the whole face was complete I selected one line shape and converted it to an
 The next
